ScriptorIA redacta tus documentos —memorias técnicas, ofertas, órdenes de compra, comparativas…— a partir de tus propias fuentes, con IA, y citando de dónde sale cada cosa.
Tú eliges qué tipo de documento quieres (la plantilla), le das el material (fuentes y guion), y ScriptorIA genera el documento sección a sección. Nada se inventa de la nada: cada apartado se apoya en documentos citables que tú aportas.
Esta guía recorre el flujo completo con capturas reales y un ejemplo: preparar una Memoria de proyecto de I+D.
1 El espacio de trabajo
Al entrar verás dos zonas: a la izquierda las pestañas para navegar y a la derecha el área de trabajo. Arriba del todo, un indicador de tres pasos te guía: Plantilla → Material → Salida.
Áreas — carpetas temáticas dentro de la biblioteca (Ayudas, Comercial, Oficina Técnica…), cada una con sus plantillas.
Obras — los documentos que ya has creado o estás preparando.
Flujos — automatizaciones (generar en cadena, por horario, al detectar archivos nuevos…).
Drive — explorar los archivos de la biblioteca.
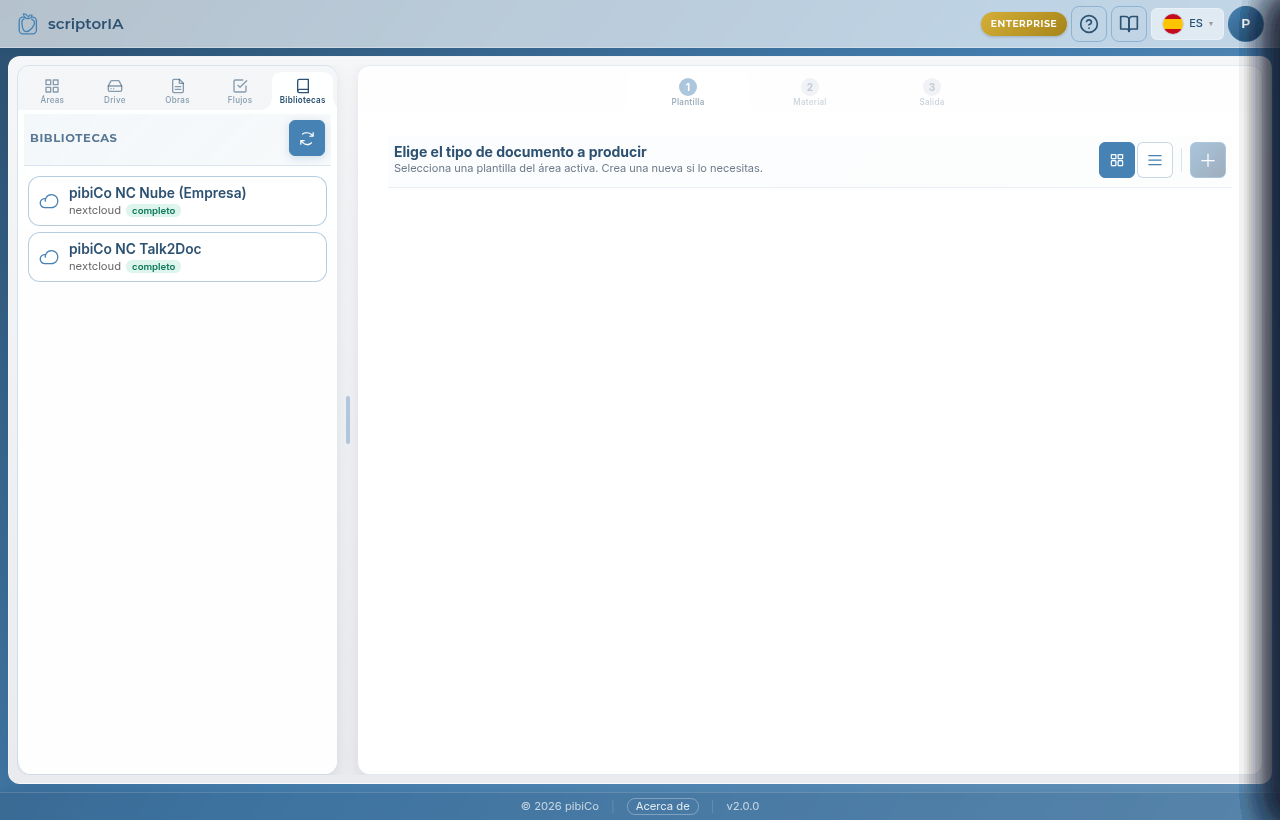
El espacio de trabajo: pestañas a la izquierda, los tres pasos arriba, y la lista de bibliotecas conectadas.
Para empezarPulsa una biblioteca y luego la pestaña Áreas para ver sus carpetas. Las bibliotecas las conecta un administrador; tú trabajas dentro de ellas.
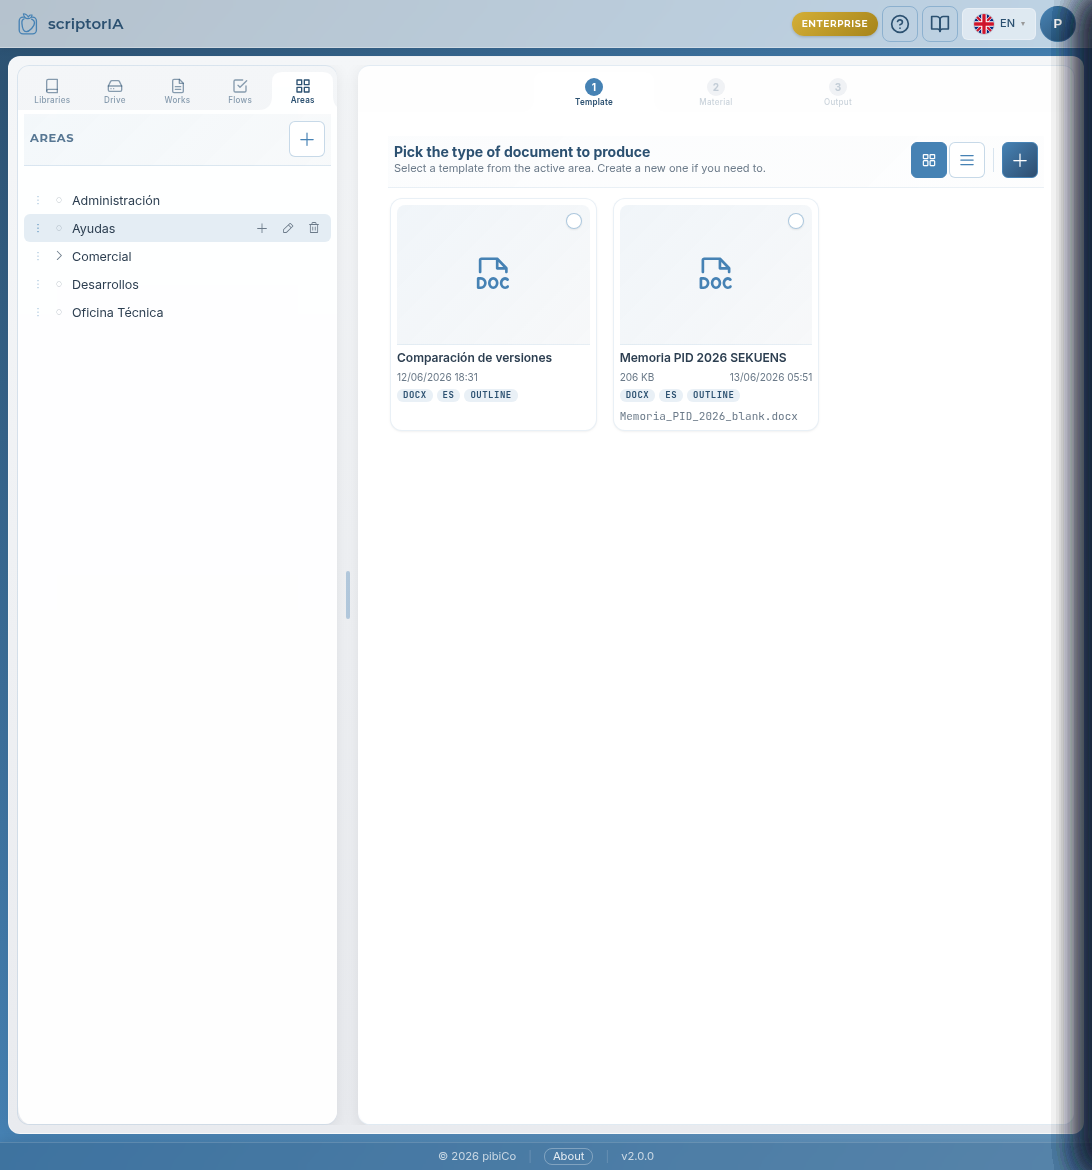
2 Paso 1 — Elige el tipo de documento
Dentro de un área verás las plantillas disponibles: cada una es un tipo de documento que ScriptorIA sabe producir. Una plantilla define la estructura, el formato de salida (DOCX, PDF, Excel…) y qué espera de ti.
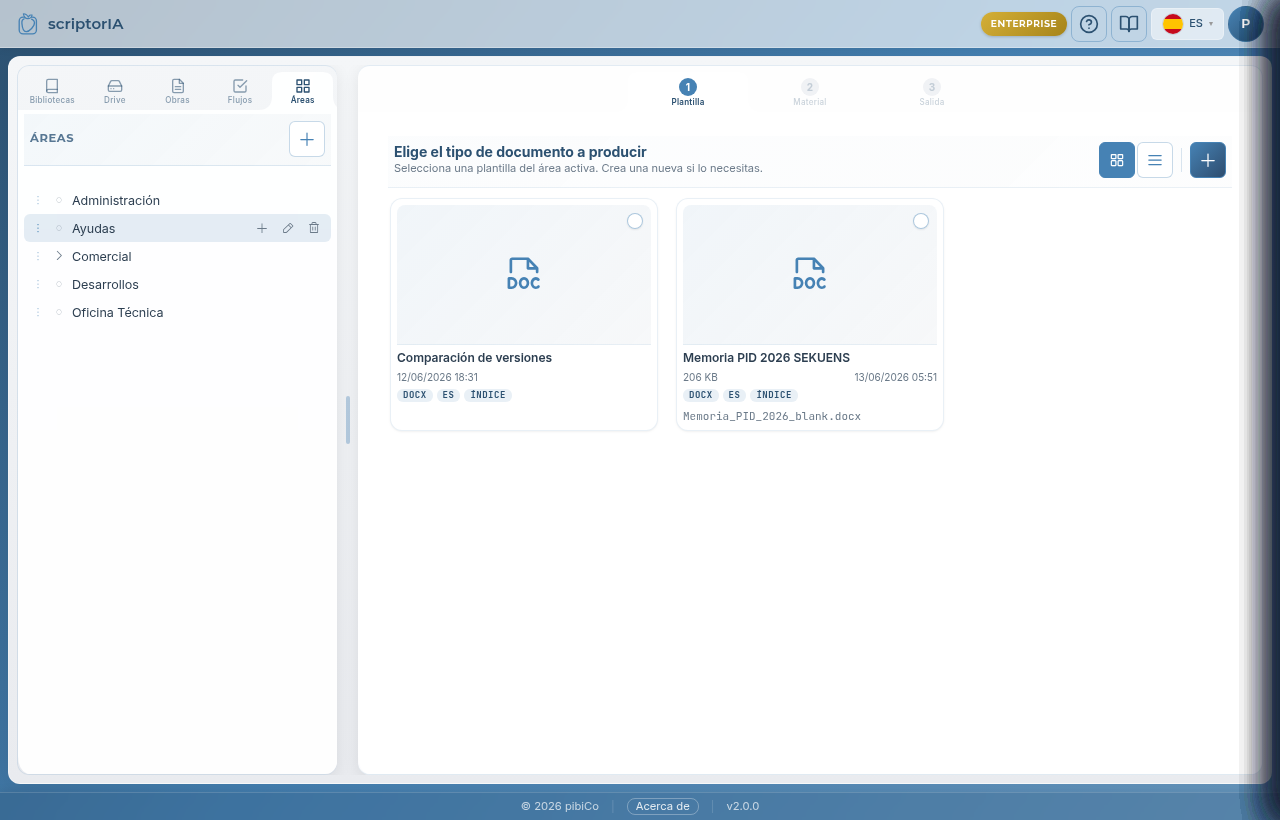
Paso 1: elige el tipo de documento. Cada tarjeta muestra el formato (DOCX), el idioma y si lleva índice.
EjemploEn el área Ayudas elegimos Memoria PID 2026 SEKUENS — una memoria técnica de proyecto de I+D en DOCX, con un índice de capítulos predefinido.
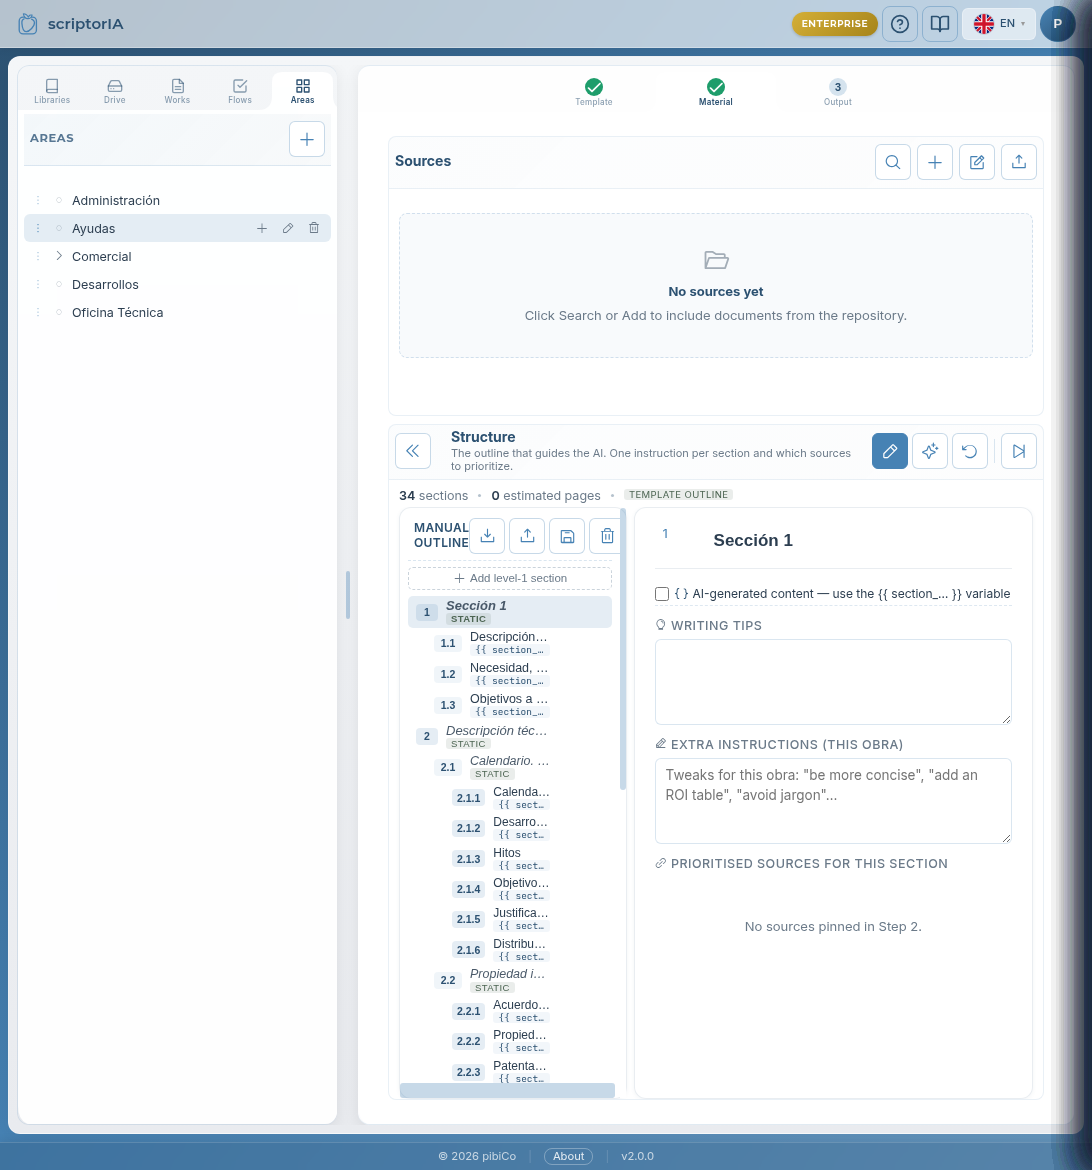
3 La plantilla y su índice
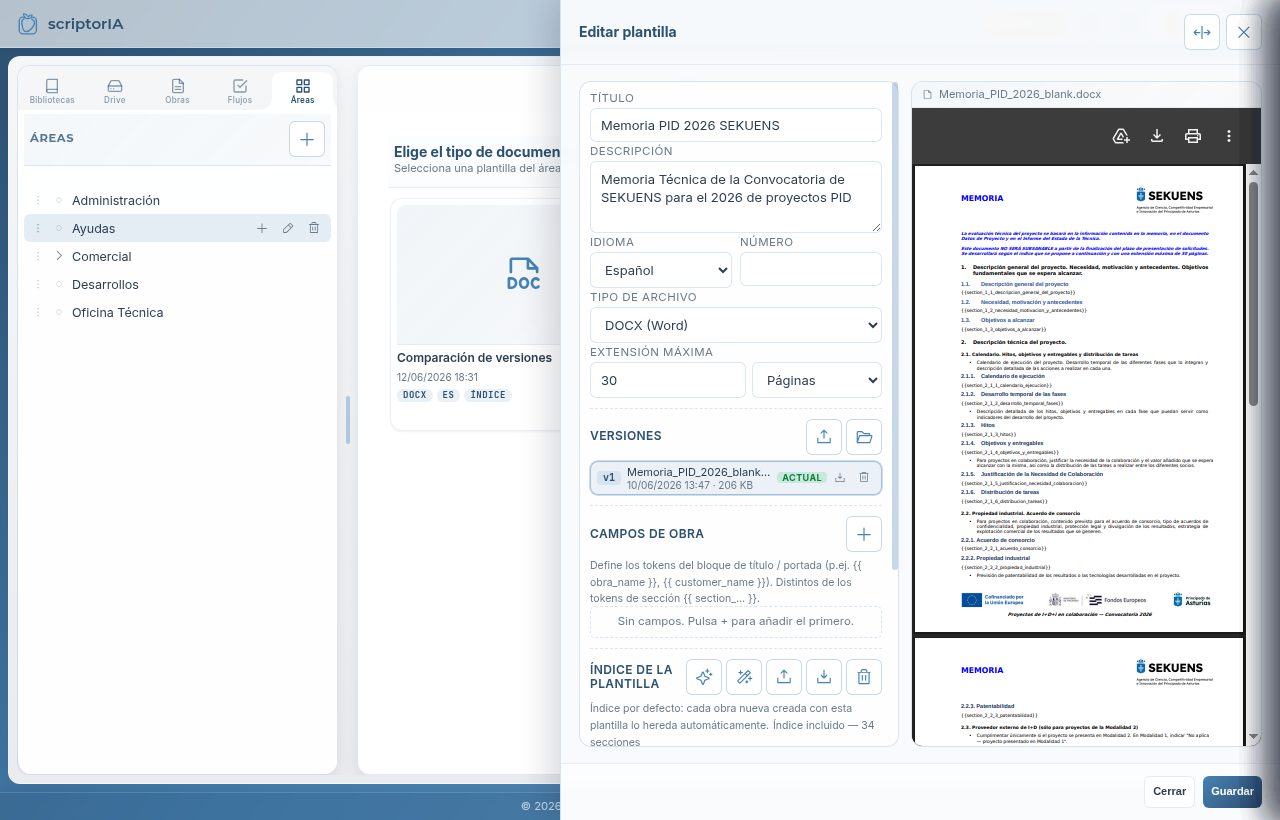
Cada plantilla trae su índice (los capítulos del documento) y, opcionalmente, campos de portada (título del proyecto, cliente…) y una vista previa del formato final. La plantilla es genérica y reutilizable: lo específico de tu proyecto lo aportas tú en el siguiente paso.
La plantilla define el índice (aquí, 34 secciones), el formato DOCX y los campos de portada. A la derecha, la previsualización del documento de salida.
Plantilla genérica → obra específicaLa plantilla describe la estructura (qué capítulos y de qué van en general). El contenido concreto de tu proyecto va en la obra: las fuentes y el guion de cada sección. Así una misma plantilla sirve para muchos proyectos.
4 Paso 2 — Material: tus fuentes
Aquí preparas de dónde sacará el contenido la IA. ScriptorIA nunca redacta «a ciegas»: todo apartado se apoya en documentos que tú pones en el material de la obra. Tienes tres formas de aportar material:
Buscar / Añadir del repositorio — toma documentos que ya están en tu biblioteca (PDFs, informes, memorias previas…).
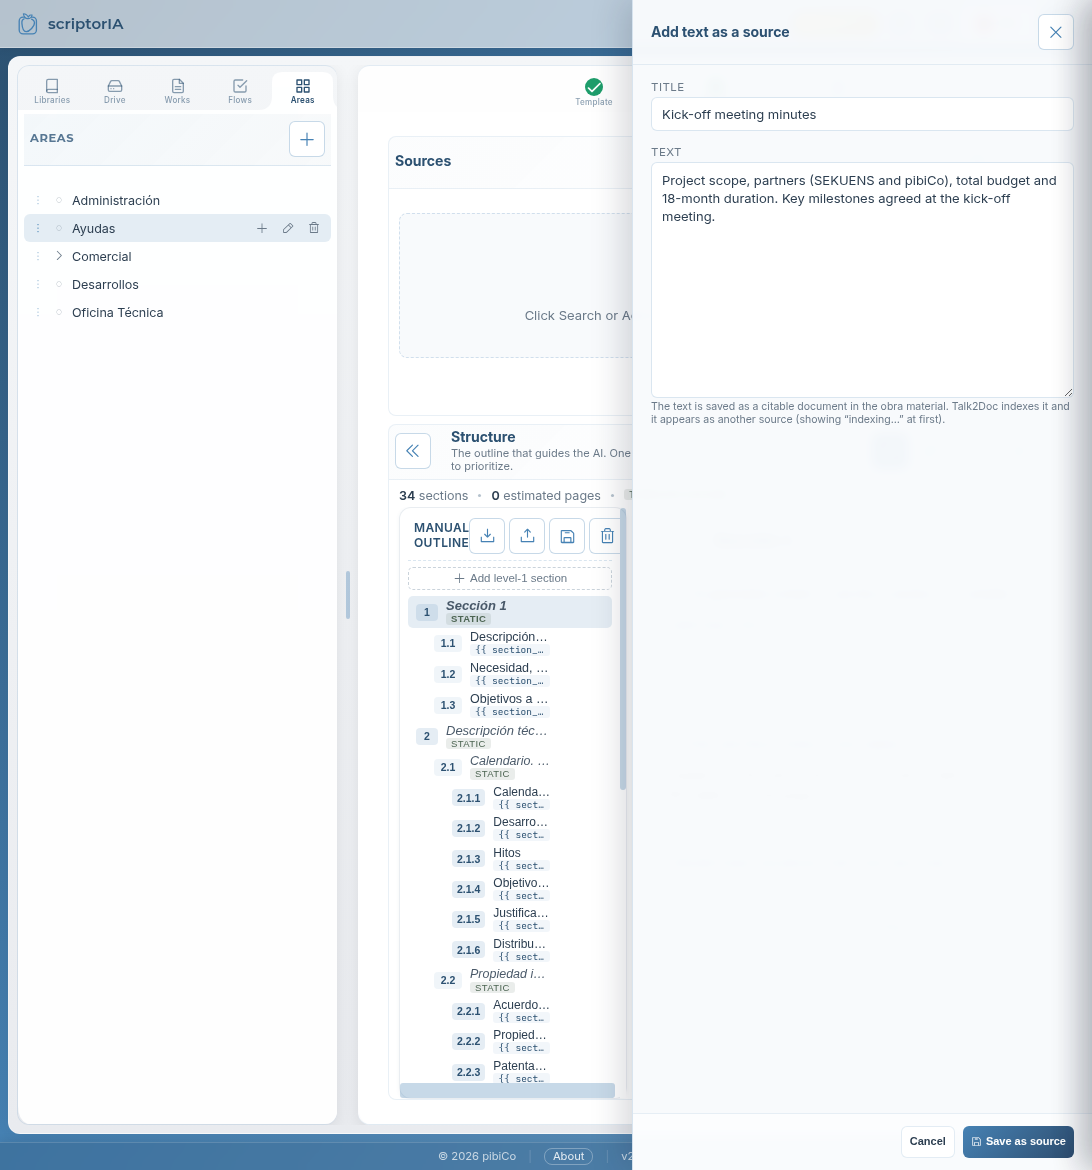
Añadir texto — pega o escribe una nota al vuelo (un acta, unos puntos clave). Se guarda como un documento citable más.
Subir archivo — sube un PDF, DOCX o nota desde tu equipo; se incorpora al material de la obra.
Regla de oroTodo lo que aportes se convierte en un documento citable (con su referencia). Por eso no se «inyecta texto suelto»: así cada frase del documento final puede rastrearse hasta su fuente. Al principio la fuente aparece como «indexando…» mientras el sistema la procesa; la generación no arranca hasta que termina — si lo intentas antes, te avisa y espera.
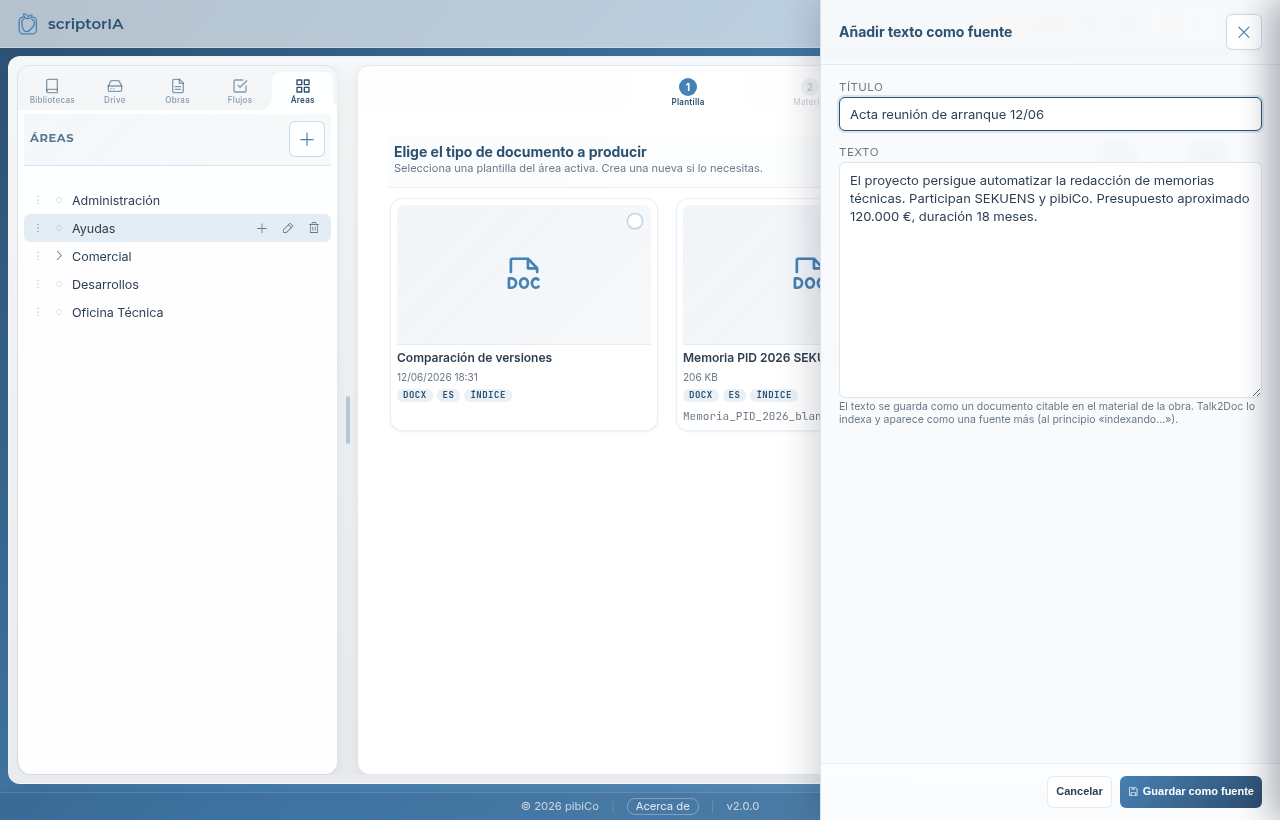
«Añadir texto como fuente»: un título y el texto. Queda como un documento citable en el material de la obra.
EjemploPegamos el Acta de reunión de arranque con el alcance, los socios (SEKUENS y pibiCo), el presupuesto y la duración. Ese texto alimentará los apartados de objetivos, consorcio y presupuesto.
La estructura y la ficha de cada sección
A la derecha del material está la Estructura (el índice). En cada sección puedes abrir su ficha y dirigir cómo se genera:
De dónde — qué fuentes (o qué apartados concretos de una fuente) alimentan esta sección.
Qué decir — el guion del autor: los puntos que quieres tratar.
Cómo decirlo — instrucciones de estilo («más conciso», «añade una tabla»…).
Coste — una estimación antes de generar; nunca se dispara una generación sin mostrar el coste.
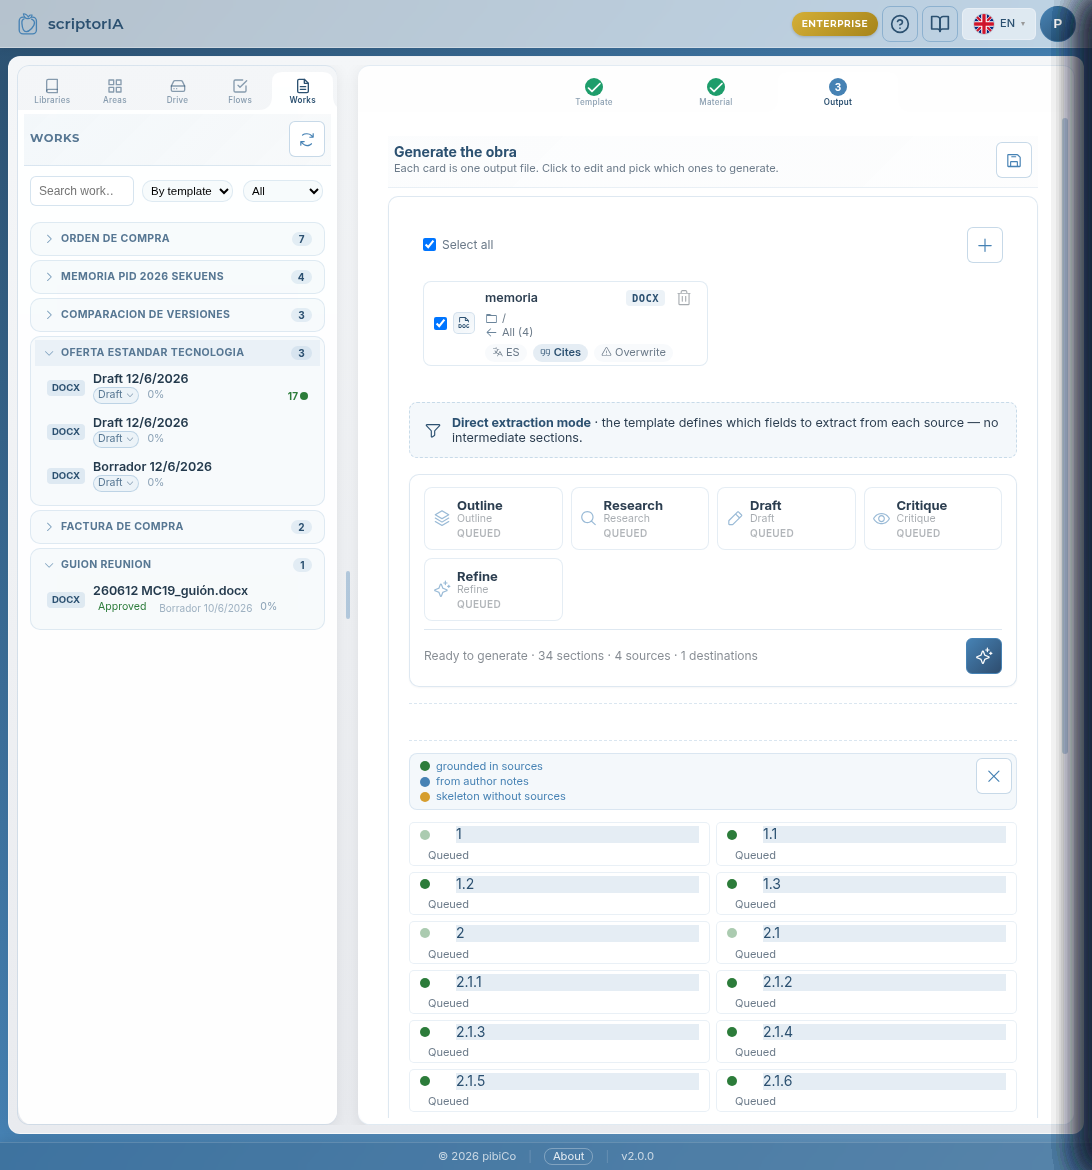
5 Generar tu documento (la obra)
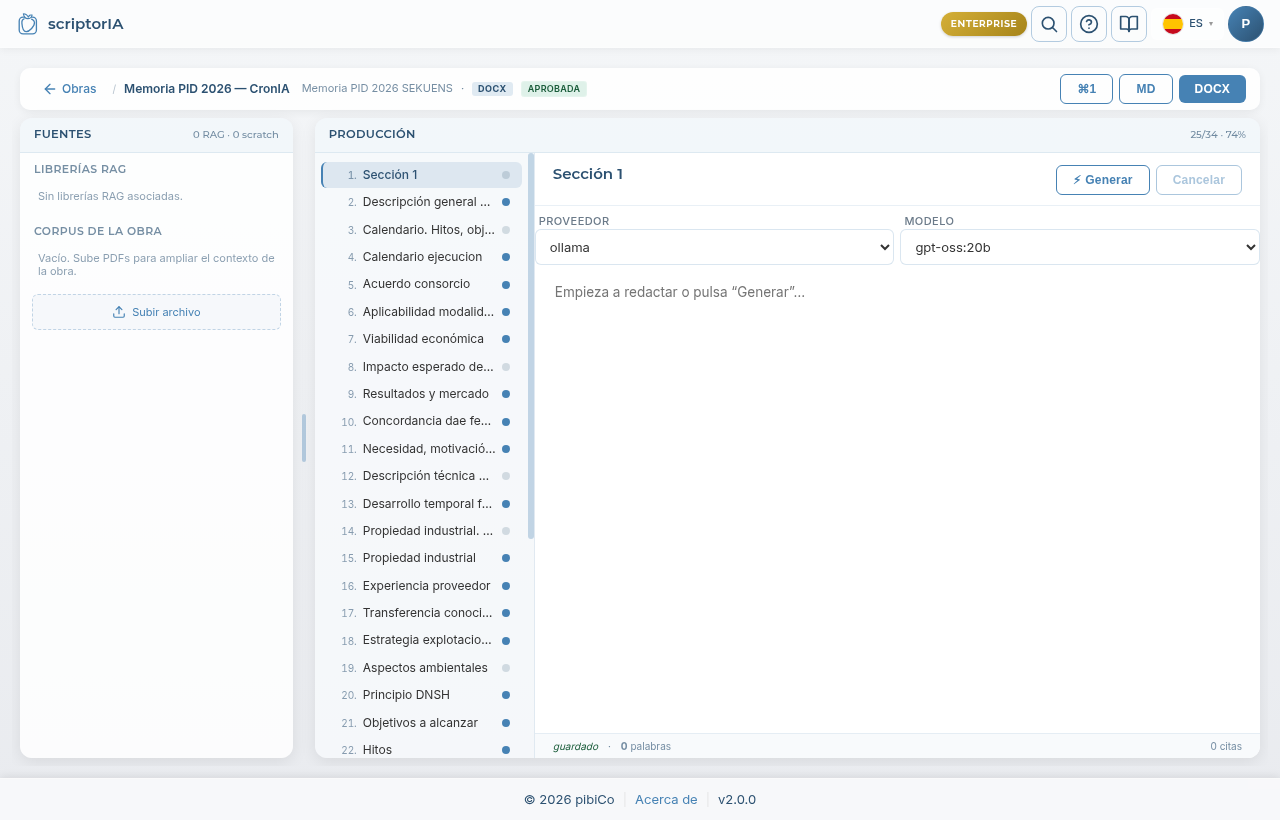
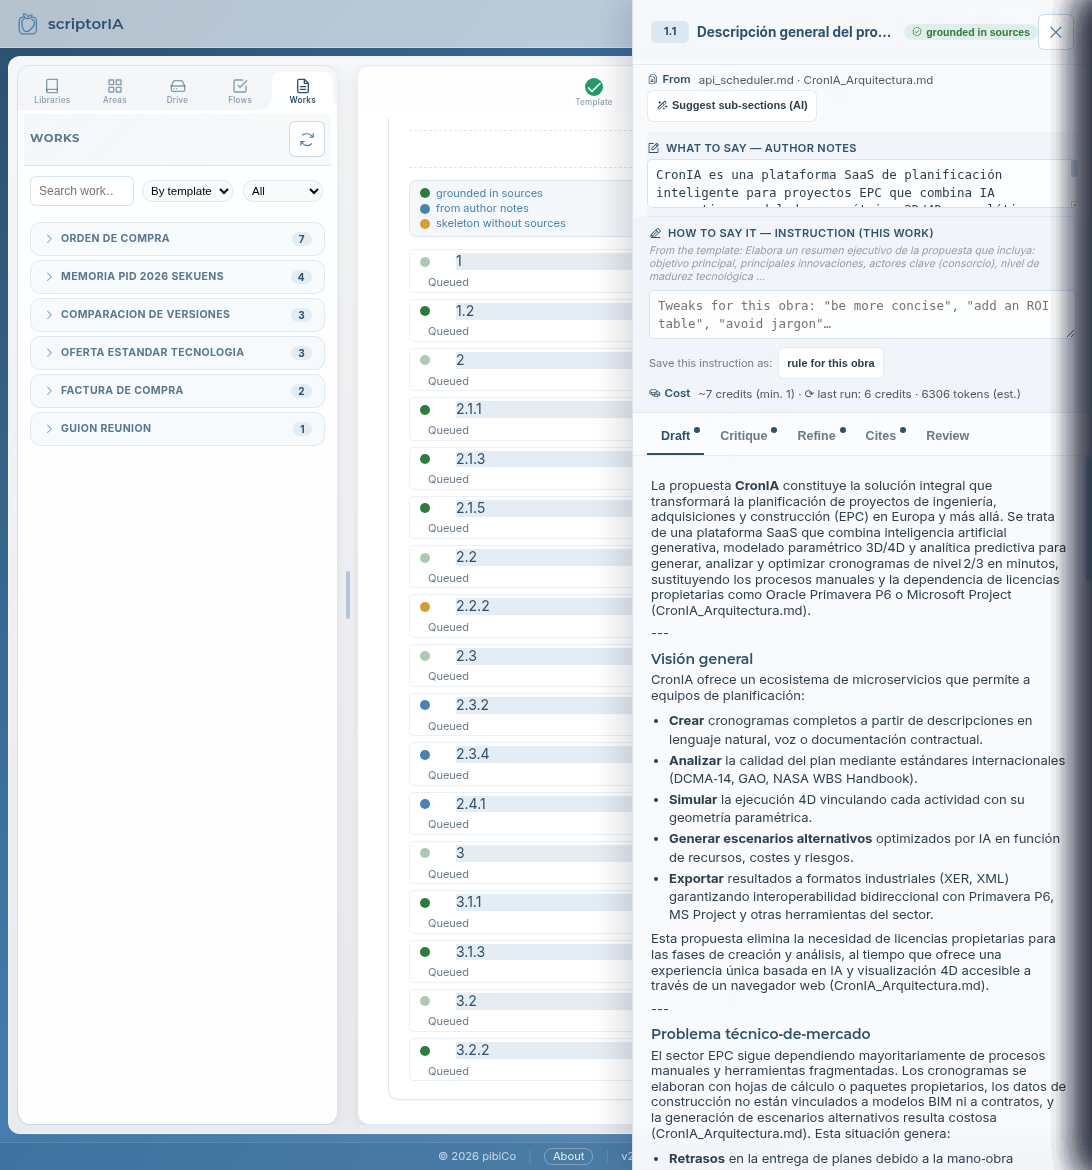
Con el material listo, ScriptorIA genera el documento. La obra es tu documento en producción: a la izquierda sus fuentes, en el centro el índice de secciones, y a la derecha el editor de la sección seleccionada.
Puedes generar una sección (botón Generar) o todas en cadena. Eliges el proveedor y el modelo de IA, y el sistema redacta apoyándose en las fuentes priorizadas, dejando las citas de cada afirmación.
La obra en producción: índice de secciones en el centro, editor a la derecha (proveedor/modelo + Generar), y las fuentes a la izquierda (con «Subir archivo» para ampliar el contexto).
El semáforo de cada sección
Cada sección lleva un estado que te dice de qué se apoya su contenido:
Con fuentes — apoyada en documentos citables Con notas — guiada por tu guion Sin fuente — esqueleto genérico, conviene añadir material
El ámbar es tu lista de la compraSi una sección sale en amarillo, te está diciendo «esperaba una fuente que no le has dado». Añádela al material y regenera solo esa sección.
6 Revisión y mejora
Cuando un documento está redactado, puedes mejorarlo de dos formas:
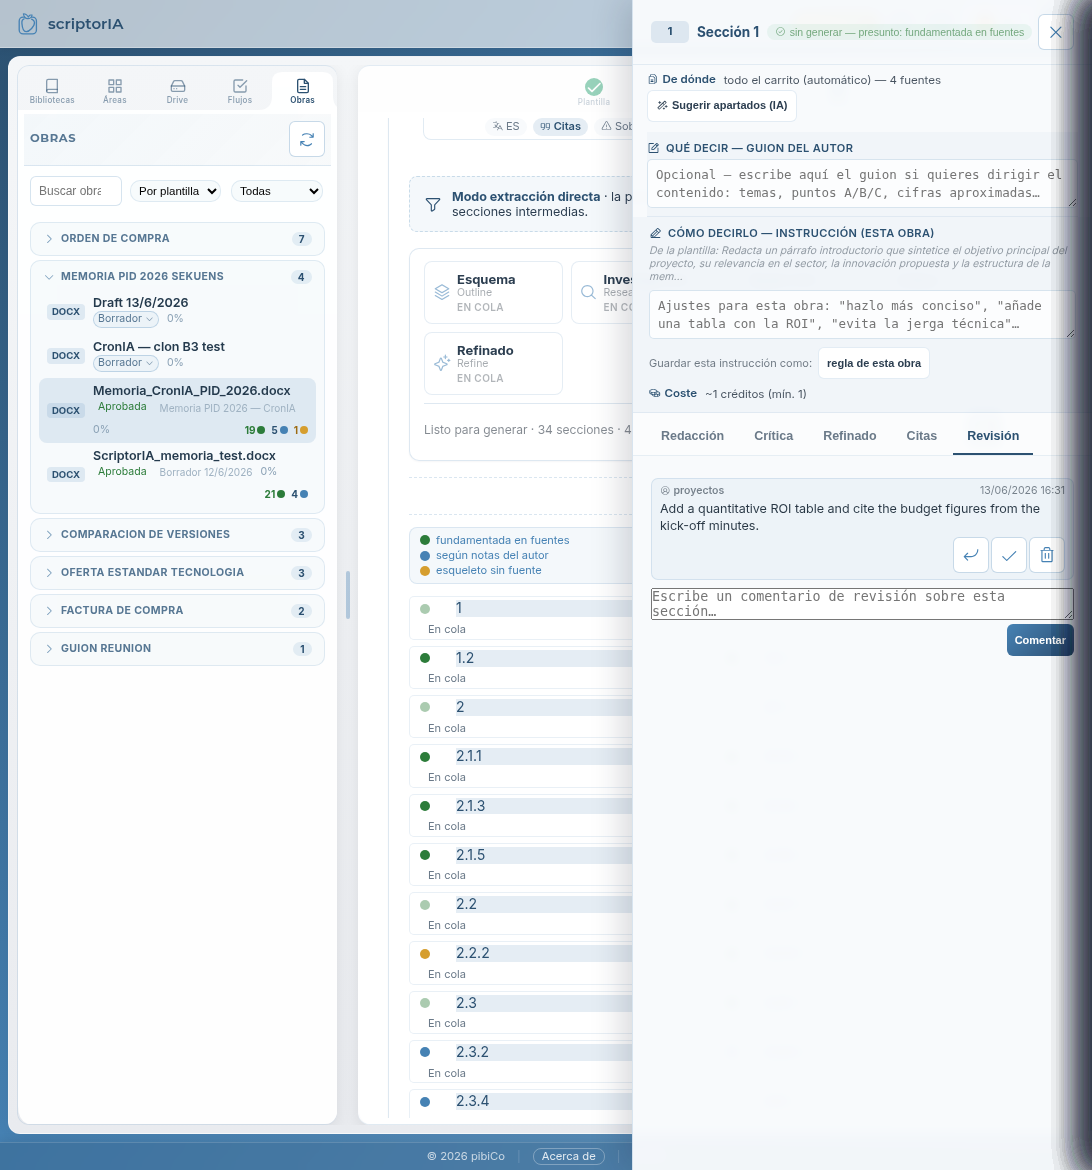
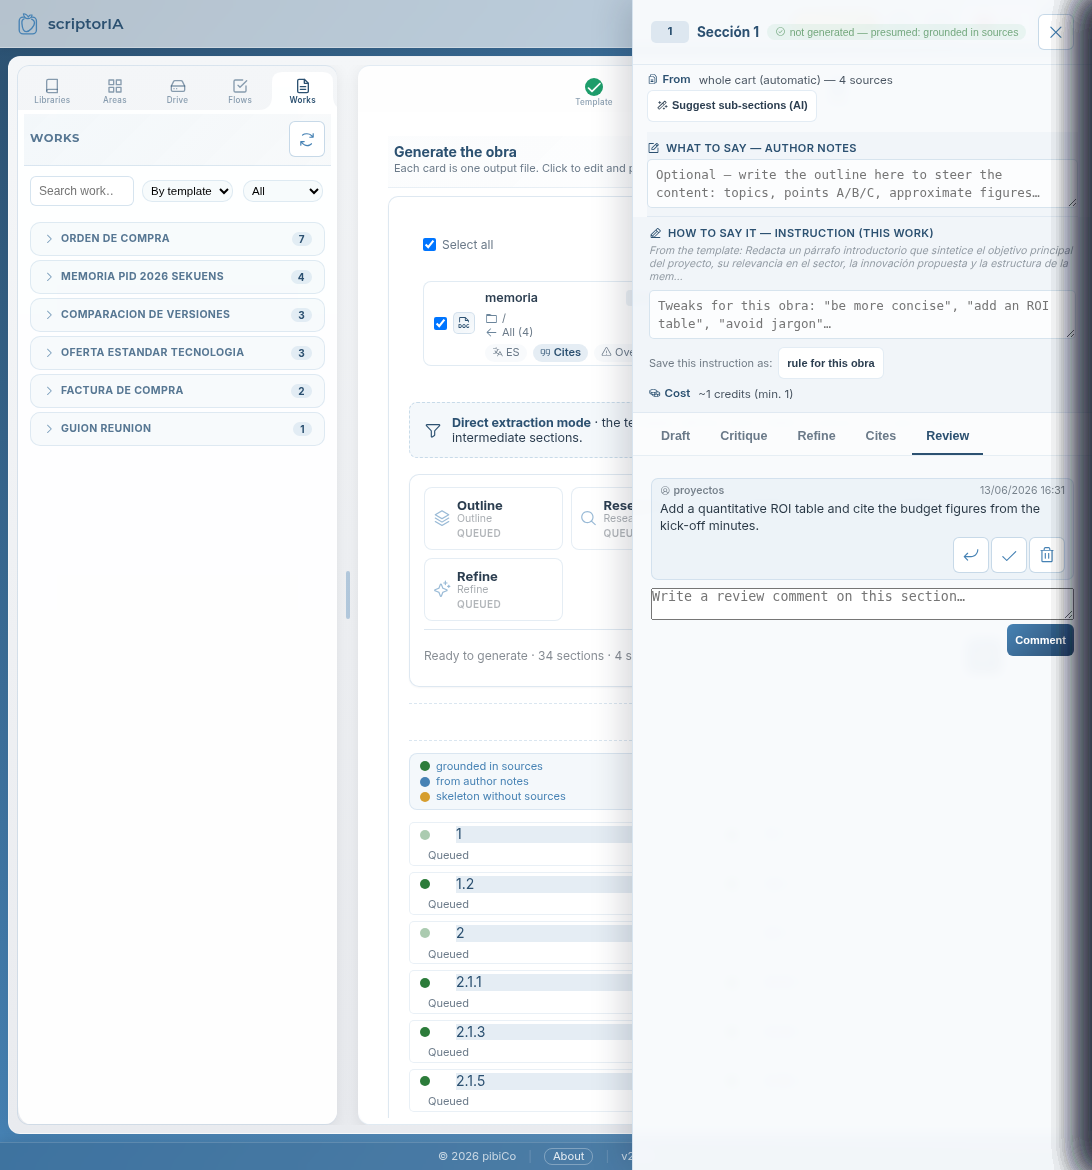
Comentarios de revisión — abre la pestaña Revisión de una sección y deja un comentario (lo puede hacer otra persona de tu organización). Los comentarios abiertos se marcan con un contador; se pueden resolver o reabrir.
Usar al refinar — desde un comentario, pásalo a «Cómo decirlo» y regenera esa sección: el comentario guía la nueva versión.
El ciclo natural es: el autor genera → un revisor comenta por sección → el autor refina con el comentario → nueva versión. El historial queda dentro de ScriptorIA; el documento exportado sale limpio.
La pestaña Revisión de una sección: deja comentarios, resuélvelos o pásalos a «Cómo decirlo» para refinar y regenerar.
Reutilizar trabajo
Clonar una obra — parte de un documento anterior: se traslada el guion y las prioridades de fuentes por sección, y solo cambias lo nuevo.
Flujos — automatiza la generación (en cadena, por horario o al detectar archivos nuevos en una carpeta).
7 Paso 3 — Salida y exportación
El paso final es obtener el documento en su formato: DOCX, PDF, Excel, etc., según la plantilla. ScriptorIA renderiza el documento con su portada y estructura, y conserva las citas a lo largo del documento.
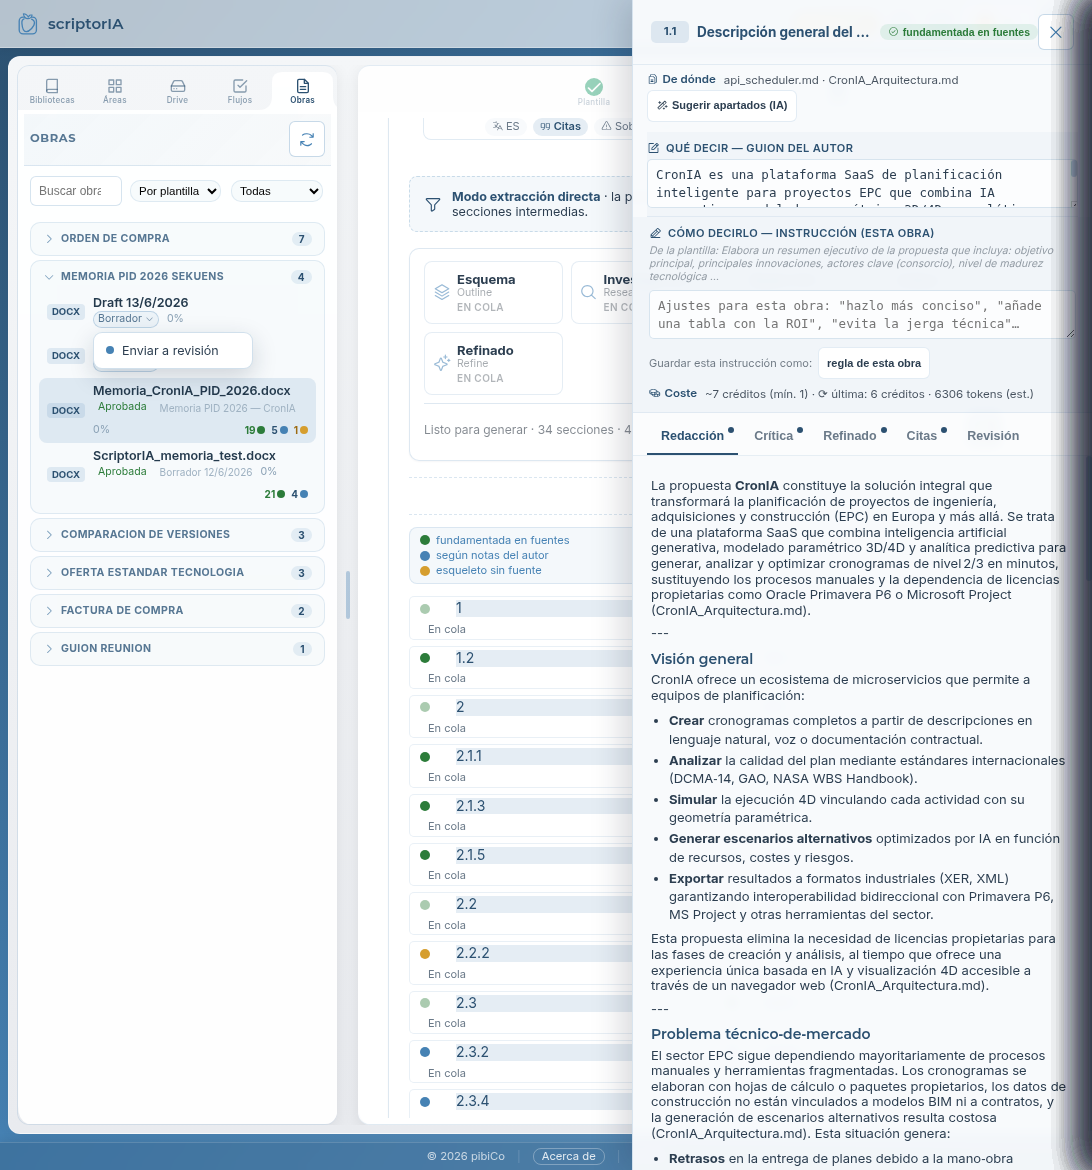
Revisa cada sección en su editor (vista MD para texto, DOCX para el formato final).
Comprueba el contador de palabras y citas al pie de cada sección.
Exporta cuando el documento esté completo y revisado.
El editor de cada sección con el contenido redactado; alterna entre vista MD y el formato final DOCX, y revisa el contador de palabras y citas antes de exportar.
EjemploLa Memoria PID 2026 se exporta en DOCX con la portada de la convocatoria, los 34 capítulos redactados y las citas a las fuentes (acta de arranque, informes técnicos, presupuesto…).
8 Consejos para buenos resultados
Buenas fuentes = buen documento. La calidad del resultado depende del material que aportes. Si una sección queda floja, casi siempre es porque le falta fuente.
Dirige por sección. Usa la ficha: prioriza qué fuente alimenta cada apartado y escribe el guion de lo que quieres contar.
El amarillo no es un error, es una señal: indica dónde falta material citable.
Aporta material al vuelo con «Añadir texto» o «Subir archivo» sin salir del flujo.
Reutiliza. Clona una obra parecida en vez de empezar de cero.
Revisa antes de exportar. Comenta, refina y regenera las secciones que lo necesiten.
¿Dudas?Vuelve a esta guía en cualquier momento desde el botón de Ayuda (?) de la barra superior.
How ScriptorIA works
ScriptorIA writes your documents —technical reports, proposals, purchase orders, comparisons…— from your own sources, with AI, citing where every claim comes from.
You choose which kind of document you want (the template), give it the material (sources and a brief), and ScriptorIA generates the document section by section. Nothing is made up out of thin air: every part is grounded in citable documents you provide.
This guide walks the full flow with real screenshots and an example: preparing an R&D project report.
1 The workspace
When you log in you see two zones: navigation tabs on the left and the work area on the right. At the very top, a three-step indicator guides you: Template → Material → Output.
The left-hand tabs are:
Libraries — the connected document sources (your Nextcloud, Drive…). Start by picking one.
Areas — topic folders inside the library (Grants, Sales, Engineering…), each with its own templates.
Works — the documents you have already created or are preparing.
Flows — automations (chained generation, on a schedule, when new files appear…).
Drive — browse the library's files.
The workspace: tabs on the left, the three steps on top, and the list of connected libraries.
To get startedClick a library, then the Areas tab to see its folders. Libraries are connected by an administrator; you work inside them.
2 Step 1 — Choose the document type
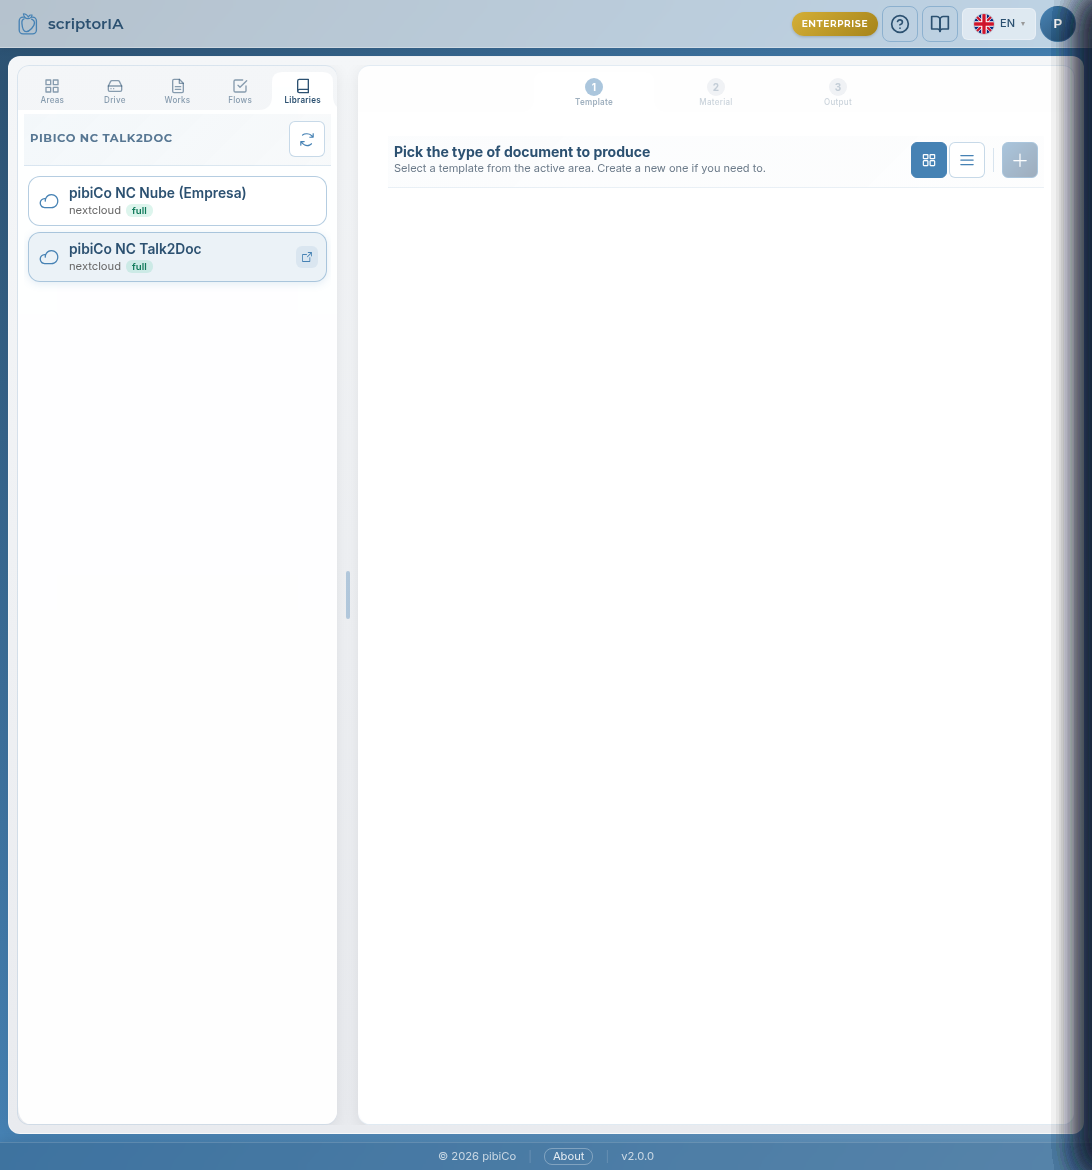
Inside an area you see the available templates: each one is a document type ScriptorIA knows how to produce. A template defines the structure, the output format (DOCX, PDF, Excel…) and what it expects from you.
Step 1: choose the document type. Each card shows the format (DOCX), the language and whether it carries an index.
ExampleIn the Grants area we pick Memoria PID 2026 SEKUENS — a technical R&D project report in DOCX, with a predefined chapter index.
3 The template and its index
Each template carries its index (the document's chapters) and, optionally, cover fields (project title, client…) and a preview of the final format. The template is generic and reusable: what's specific to your project you provide in the next step.
The template defines the index (here, 34 sections), the DOCX format and the cover fields. On the right, the preview of the output document.
Generic template → specific workThe template describes the structure (which chapters and what they cover in general). The concrete content of your project goes in the work: the sources and the brief for each section. That way one template serves many projects.
4 Step 2 — Material: your sources
Here you set up where the AI will draw content from. ScriptorIA never writes "blind": every part is grounded in documents you add to the work's material. There are three ways to provide material:
Search / Add from the repository — pull documents already in your library (PDFs, reports, previous reports…).
Add text — paste or type a note on the fly (minutes, a few key points). It is saved as one more citable document.
Upload file — upload a PDF, DOCX or note from your computer; it joins the work's material.
Golden ruleEverything you add becomes a citable document (with its reference). That's why no "loose text" is injected: this way every sentence in the final document can be traced back to its source. At first a source shows as "indexing…" while the system processes it; generation won't start until it finishes — if you try earlier, it warns you and waits.
"Add text as a source": a title and the text. It becomes a citable document in the work's material.
ExampleWe paste the Kick-off meeting minutes with the scope, the partners (SEKUENS and pibiCo), the budget and the duration. That text will feed the objectives, consortium and budget sections.
The structure and each section's card
To the right of the material is the Structure (the index). For each section you can open its card and steer how it is generated:
Where from — which sources (or which specific parts of a source) feed this section.
What to say — the author's brief: the points you want covered.
How to say it — style instructions ("more concise", "add a table"…).
Cost — an estimate before generating; a generation never fires without showing the cost.
5 Generate your document (the work)
With the material ready, ScriptorIA generates the document. The work is your document in production: its sources on the left, the section index in the centre, and the editor for the selected section on the right.
You can generate one section (the Generate button) or all of them in a chain. You choose the AI provider and model, and the system writes grounded in the prioritized sources, leaving the citations for each claim.
The work in production: section index in the centre, editor on the right (provider/model + Generate), and sources on the left (with "Upload file" to widen the context).
Each section's traffic light
Every section carries a status telling you what its content is grounded on:
With sources — grounded in citable documents With notes — guided by your brief No source — generic skeleton, add material
Amber is your shopping listIf a section comes out yellow, it's telling you "I expected a source you didn't give me". Add it to the material and regenerate just that section.
6 Review and improve
Once a document is written, you can improve it in two ways:
Review comments — open a section's Review tab and leave a comment (someone else in your organisation can do it too). Open comments are flagged with a counter; they can be resolved or reopened.
Use when refining — from a comment, push it into "How to say it" and regenerate that section: the comment guides the new version.
The natural cycle is: the author generates → a reviewer comments per section → the author refines with the comment → a new version. The history stays inside ScriptorIA; the exported document comes out clean.
A section's Review tab: leave comments, resolve them, or push them into "How to say it" to refine and regenerate.
Reuse your work
Clone a work — start from a previous document: the brief and the per-section source priorities carry over, and you only change what's new.
Flows — automate generation (chained, on a schedule, or when new files appear in a folder).
7 Step 3 — Output and export
The final step is getting the document in its format: DOCX, PDF, Excel, etc., depending on the template. ScriptorIA renders the document with its cover and structure, and preserves the citations throughout.
Review each section in its editor (MD view for text, DOCX for the final format).
Check the words and citations counters at the foot of each section.
Export once the document is complete and reviewed.
Each section's editor with the written content; toggle between MD view and the final DOCX format, and check the words/citations counter before exporting.
ExampleThe Memoria PID 2026 is exported as DOCX with the call's cover page, the 34 written chapters and the citations to the sources (kick-off minutes, technical reports, budget…).
8 Tips for good results
Good sources = good document. The quality of the result depends on the material you provide. If a section is weak, it's almost always because it lacks a source.
Steer per section. Use the card: prioritize which source feeds each part and write the brief of what you want to tell.
Yellow is not an error, it's a signal: it shows where citable material is missing.
Add material on the fly with "Add text" or "Upload file" without leaving the flow.
Reuse. Clone a similar work instead of starting from scratch.
Review before exporting. Comment, refine and regenerate the sections that need it.
Questions?Come back to this guide any time from the Help (?) button in the top bar.